Read the Docs tutorial
In this tutorial you will create a documentation project on Read the Docs by importing a Sphinx project from a GitHub repository, tailor its configuration, and explore several useful features of the platform.
The tutorial is aimed at people interested in learning how to use Read the Docs to host their documentation projects. You will fork a fictional software library similar to the one developed in the official Sphinx tutorial. No prior experience with Sphinx is required and you can follow this tutorial without having done the Sphinx one.
The only things you will need are a web browser, an Internet connection, and a GitHub account (you can register for a free account if you don’t have one). You will use Read the Docs Community, which means that the project will be public.
Getting started
Preparing your project on GitHub
To start, sign in to GitHub and navigate to the tutorial GitHub template, where you will see a green Use this template button. Click it to open a new page that will ask you for some details:
Leave the default “Owner”, or change it to something better for a tutorial project.
Introduce an appropriate “Repository name”, for example
rtd-tutorial.Make sure the project is “Public”, rather than “Private”.
After that, click on the green Create repository from template button, which will generate a new repository on your personal account (or the one of your choosing). This is the repository you will import on Read the Docs, and it contains the following files:
.readthedocs.yamlRead the Docs configuration file. Required to setup the documentation build process.
README.rstBasic description of the repository, you will leave it untouched.
pyproject.tomlPython project metadata that makes it installable. Useful for automatic documentation generation from sources.
lumache.pySource code of the fictional Python library.
docs/Directory holding all the Sphinx documentation sources, including the Sphinx configuration
docs/source/conf.pyand the root documentdocs/source/index.rstwritten in reStructuredText.
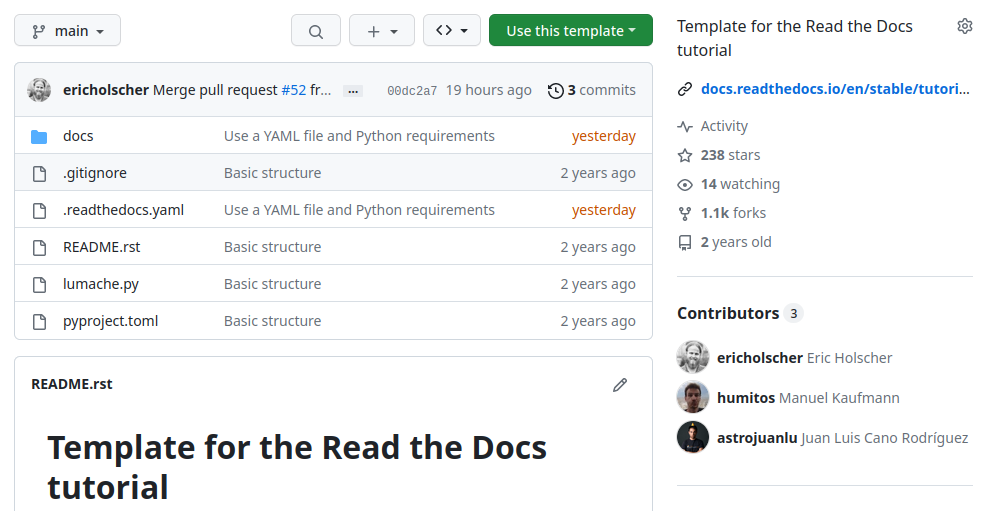
GitHub template for the tutorial
Sign up for Read the Docs
To sign up for a Read the Docs account, navigate to the Sign Up page and choose the option Sign up with GitHub. On the authorization page, click the green Authorize readthedocs button.
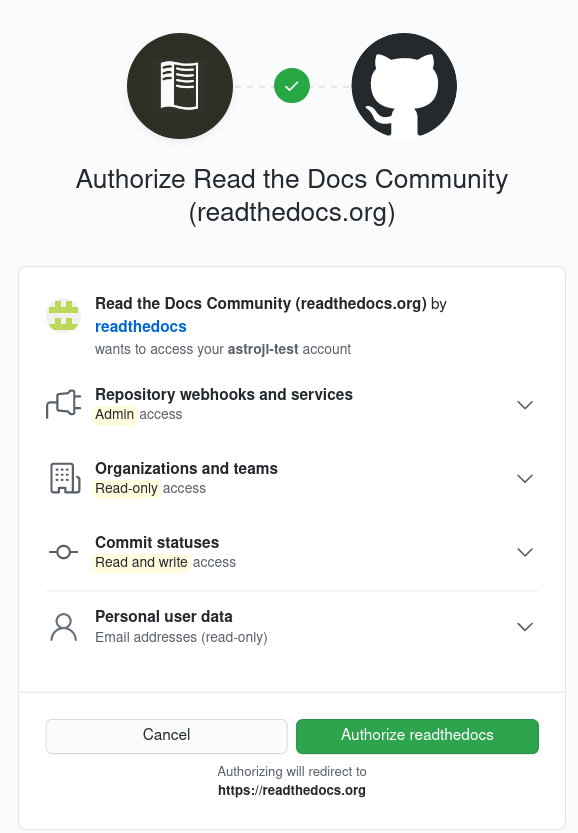
GitHub authorization page
Note
Read the Docs needs elevated permissions to perform certain operations that ensure that the workflow is as smooth as possible, like installing webhooks. If you want to learn more, check out Permissions for connected accounts.
After that, you will be redirected to Read the Docs, where you will need to confirm your e-mail and username. Clicking the Sign Up » button will create your account and redirect you to your dashboard.
By now, you should have two email notifications:
One from GitHub, telling you that “A third-party OAuth application … was recently authorized to access your account”. You don’t need to do anything about it.
Another one from Read the Docs, prompting you to “verify your email address”. Click on the link to finalize the process.
Once done, your Read the Docs account is created and ready to import your first project.
Welcome!
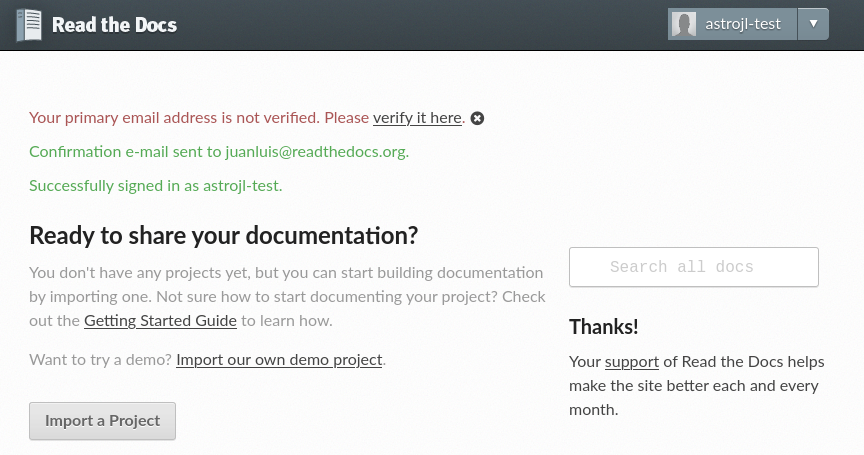
Read the Docs empty dashboard
Note
Our commercial site offers some extra features, like support for private projects. You can learn more about our two different sites.
First steps
Importing the project to Read the Docs
To import your GitHub project to Read the Docs, first click on the Import a Project button on your dashboard (or browse to the import page directly). You should see your GitHub account under the “Filter repositories” list on the right. If the list of repositories is empty, click the 🔄 button, and after that all your repositories will appear on the center.
Import projects workflow
Locate your rtd-tutorial project
(possibly clicking next ›› at the bottom if you have several pages of projects),
and then click on the ➕ button to the right of the name.
The next page will ask you to fill some details about your Read the Docs project:
- Name
The name of the project. It has to be unique across all the service, so it is better if you prepend your username, for example
{username}-rtd-tutorial.- Repository URL
The URL that contains the sources. Leave the automatically filled value.
- Default branch
Name of the default branch of the project, leave it as
main.
After hitting the Next button, you will be redirected to the project home. You just created your first project on Read the Docs! 🎉
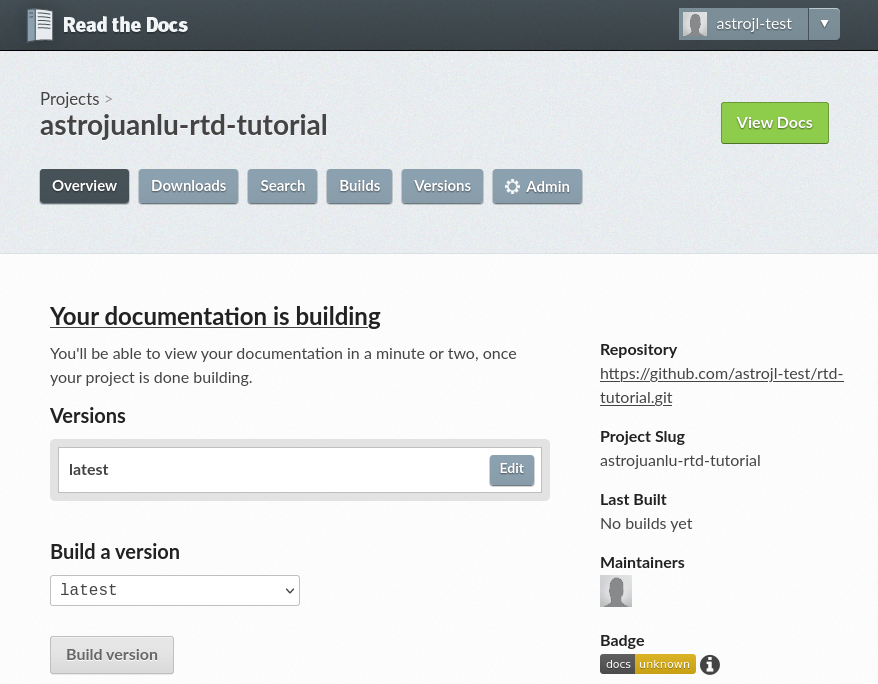
Project home
Checking the first build
Read the Docs will try to build the documentation of your project right after you create it. To see the build logs, click on the Your documentation is building link on the project home, or alternatively navigate to the “Builds” page, then open the one on top (the most recent one).
If the build has not finished yet by the time you open it, you will see a spinner next to a “Installing” or “Building” indicator, meaning that it is still in progress.

First successful documentation build
When the build finishes, you will see a green “Build completed” indicator, the completion date, the elapsed time, and a link to see the corresponding documentation. If you now click on View docs, you will see your documentation live!
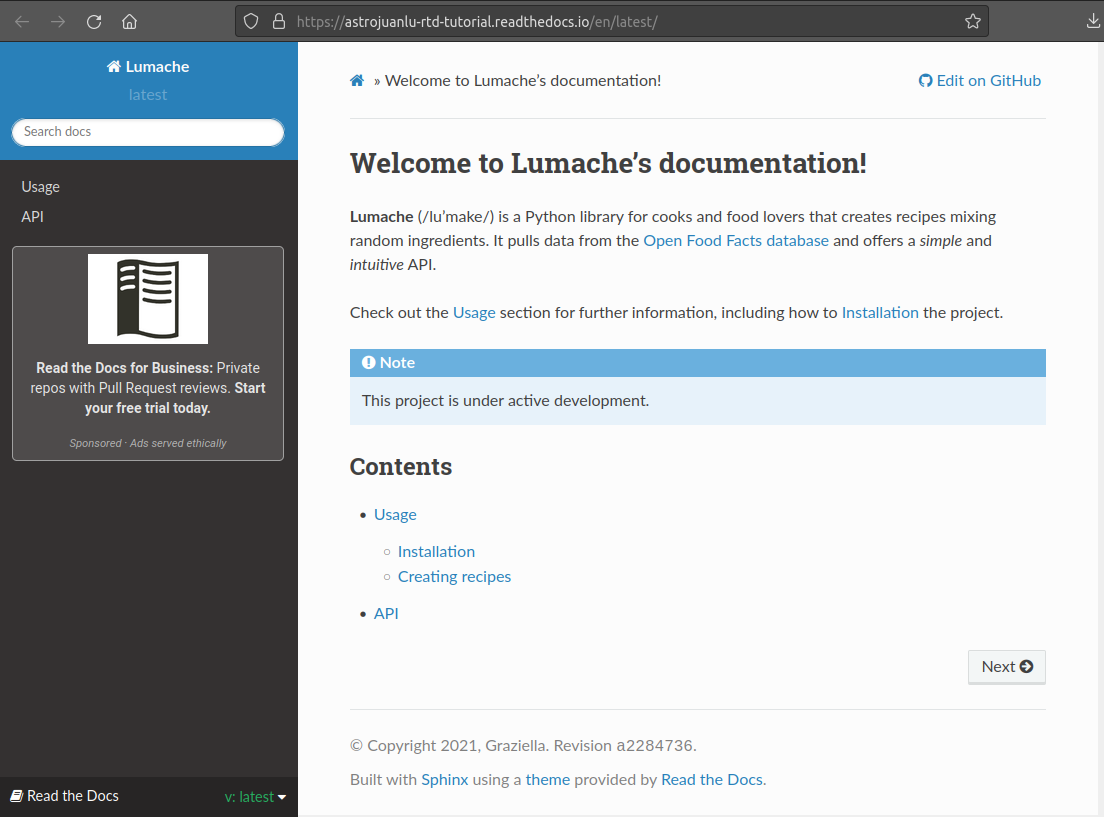
HTML documentation live on Read the Docs
Note
Advertisement is one of our main sources of revenue. If you want to learn more about how do we fund our operations and explore options to go ad-free, check out our Sustainability page.
If you don’t see the ad, you might be using an ad blocker. Our EthicalAds network respects your privacy, doesn’t target you, and tries to be as unobstrusive as possible, so we would like to kindly ask you to not block us ❤️
Basic configuration changes
You can now proceed to make some basic configuration adjustments. Navigate back to the project page and click on the ⚙ Admin button, which will open the Settings page.
First of all, add the following text in the description:
Lumache (/lu’make/) is a Python library for cooks and food lovers that creates recipes mixing random ingredients.
Then set the project homepage to https://world.openfoodfacts.org/,
and write food, python in the list of tags.
All this information will be shown on your project home.
After that, configure your email so you get a notification if the build fails. To do so, click on the Notifications link on the left, type the email where you would like to get the notification, and click the Add button. After that, your email will be shown under “Existing Notifications”.
Trigger a build from a pull request
Read the Docs allows you to trigger builds from GitHub pull requests and gives you a preview of how the documentation would look like with those changes.
To enable that functionality, first click on the Settings link on the left under the ⚙ Admin menu, check the “Build pull requests for this project” checkbox, and click the Save button at the bottom of the page.
Next, navigate to your GitHub repository, locate the file docs/source/index.rst,
and click on the ✏️ icon on the top-right with the tooltip “Edit this file”
to open a web editor (more information on their documentation).
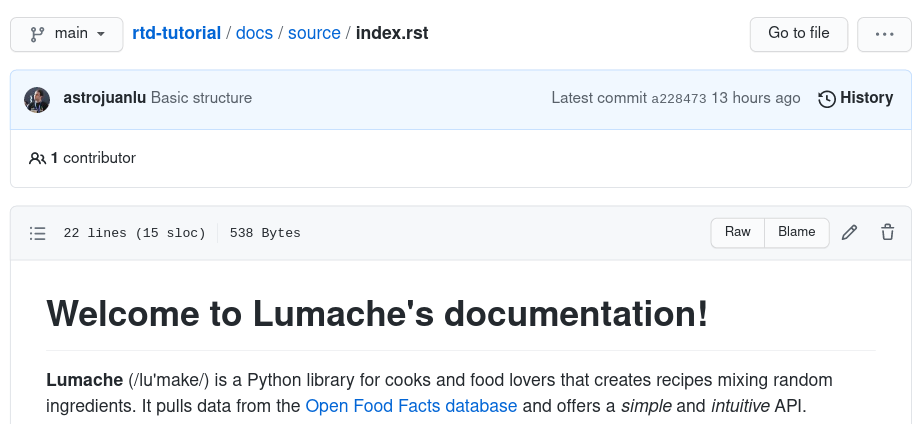
File view on GitHub before launching the editor
In the editor, add the following sentence to the file:
Lumache has its documentation hosted on Read the Docs.
Write an appropriate commit message, and choose the “Create a new branch for this commit and start a pull request” option, typing a name for the new branch. When you are done, click the green Propose changes button, which will take you to the new pull request page, and there click the Create pull request button below the description.
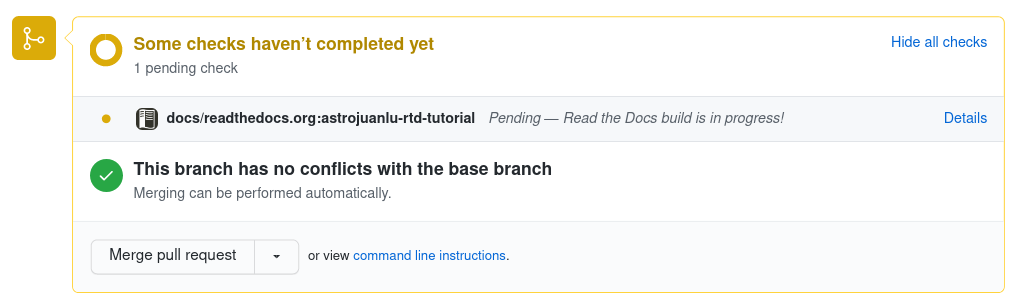
Read the Docs building the pull request from GitHub
After opening the pull request, a Read the Docs check will appear indicating that it is building the documentation for that pull request. If you click on the Details link while it is building, you will access the build logs, otherwise it will take you directly to the documentation. When you are satisfied, you can merge the pull request!
Adding a configuration file
The Admin tab of the project home allows you
to change some global configuration values of your project.
In addition, you can further customize the building process
using the .readthedocs.yaml configuration file.
This has several advantages:
The configuration lives next to your code and documentation, tracked by version control.
It can be different for every version (more on versioning in the next section).
Some configurations are only available using the config file.
This configuration file should be part of your Git repository.
It should be located in the base folder of the repository and be named .readthedocs.yaml.
In this section, we will show you some examples of what a configuration file should contain.
Tip
Settings that apply to the entire project are controlled in the web dashboard, while settings that are version or build specific are better in the YAML file.
Changing the Python version
For example, to explicitly use Python 3.8 to build your project,
navigate to your GitHub repository, click on .readthedocs.yaml file and then in the pencil icon ✏️ to edit the file
and change the Python version as follows:
version: 2

build:
  os: "ubuntu-22.04"
  tools:
    python: "3.8"

python:
  install:
    - requirements: docs/requirements.txt

sphinx:
  configuration: docs/source/conf.py
The purpose of each key is:
versionMandatory, specifies version 2 of the configuration file.
build.osRequired to specify the Python version, states the name of the base image.
build.tools.pythonDeclares the Python version to be used.
python.install.requirementsSpecifies the Python dependencies to install required to build the documentation.
After you commit these changes, go back to your project home,
navigate to the “Builds” page, and open the new build that just started.
You will notice that one of the lines contains python -mvirtualenv:
if you click on it, you will see the full output of the corresponding command,
stating that it used Python 3.8.6 to create the virtual environment.
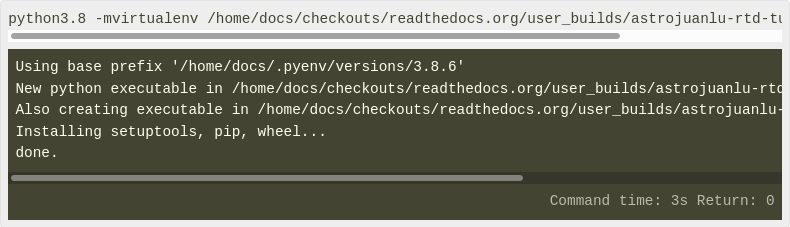
Read the Docs build using Python 3.8
Making warnings more visible
If you navigate to your HTML documentation, you will notice that the index page looks correct but the API section is empty. This is a very common issue with Sphinx, and the reason is stated in the build logs. On the build page you opened before, click on the View raw link on the top right, which opens the build logs in plain text, and you will see several warnings:
WARNING: [autosummary] failed to import 'lumache': no module named lumache
...
WARNING: autodoc: failed to import function 'get_random_ingredients' from module 'lumache'; the following exception was raised:
No module named 'lumache'
WARNING: autodoc: failed to import exception 'InvalidKindError' from module 'lumache'; the following exception was raised:
No module named 'lumache'
To spot these warnings more easily and allow you to address them,
you can add the sphinx.fail_on_warning option to your Read the Docs configuration file.
For that, navigate to GitHub, locate the .readthedocs.yaml file you created earlier,
click on the ✏️ icon, and add these contents:
version: 2

build:
  os: "ubuntu-22.04"
  tools:
    python: "3.8"

python:
  install:
    - requirements: docs/requirements.txt

sphinx:
  configuration: docs/source/conf.py
  fail_on_warning: true
At this point, if you navigate back to your “Builds” page,
you will see a Failed build, which is exactly the intended result:
the Sphinx project is not properly configured yet,
and instead of rendering an empty API page, now the build fails.
The reason sphinx.ext.autosummary and sphinx.ext.autodoc
fail to import the code is because it is not installed.
Luckily, the .readthedocs.yaml also allows you to specify
which requirements to install.
To install the library code of your project,
go back to editing .readthedocs.yaml on GitHub and modify it as follows:
python:
  install:
    - requirements: docs/requirements.txt
    # Install our python package before building the docs
    - method: pip
      path: .
With this change, Read the Docs will install the Python code
before starting the Sphinx build, which will finish seamlessly.
If you go now to the API page of your HTML documentation,
you will see the lumache summary!
Enabling PDF and EPUB builds
Sphinx can build several other formats in addition to HTML, such as PDF and EPUB. You might want to enable these formats for your project so your users can read the documentation offline.
To do so, add this extra content to your .readthedocs.yaml:
sphinx:
  configuration: docs/source/conf.py
  fail_on_warning: true

formats:
  - pdf
  - epub
After this change, PDF and EPUB downloads will be available both from the “Downloads” section of the project home, as well as the flyout menu.
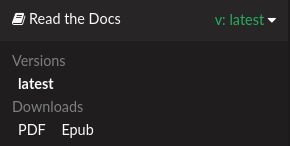
Downloads available from the flyout menu
Versioning documentation
Read the Docs allows you to have several versions of your documentation,
in the same way that you have several versions of your code.
By default, it creates a latest version
that points to the default branch of your version control system
(main in the case of this tutorial),
and that’s why the URLs of your HTML documentation contain the string /latest/.
Creating a new version
Let’s say you want to create a 1.0 version of your code,
with a corresponding 1.0 version of the documentation.
For that, first navigate to your GitHub repository, click on the branch selector,
type 1.0.x, and click on “Create branch: 1.0.x from ‘main’”
(more information on their documentation).
Next, go to your project home, click on the Versions button, and under “Active Versions” you will see two entries:
The
latestversion, pointing to themainbranch.A new
stableversion, pointing to theorigin/1.0.xbranch.
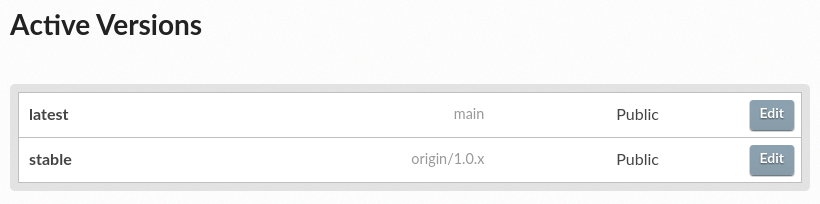
List of active versions of the project
Right after you created your branch,
Read the Docs created a new special version called stable pointing to it,
and started building it. When the build finishes,
the stable version will be listed in the flyout menu
and your readers will be able to choose it.
Note
Read the Docs follows some rules
to decide whether to create a stable version pointing to your new branch or tag.
To simplify, it will check if the name resembles a version number
like 1.0, 2.0.3 or 4.x.
Now you might want to set stable as the default version,
rather than latest,
so that users see the stable documentation
when they visit the root URL of your documentation
(while still being able to change the version in the flyout menu).
For that, go to the Settings link
under the ⚙ Admin menu of your project home,
choose stable in the “Default version*” dropdown,
and hit Save at the bottom.
Done!
Modifying versions
Both latest and stable are now active, which means that
they are visible for users, and new builds can be triggered for them.
In addition to these, Read the Docs also created an inactive 1.0.x
version, which will always point to the 1.0.x branch of your repository.

List of inactive versions of the project
Let’s activate the 1.0.x version.
For that, go to the “Versions” on your project home,
locate 1.0.x under “Activate a version”,
and click on the Activate button.
This will take you to a new page with two checkboxes,
“Active” and “Hidden”. Check only “Active”,
and click Save.
After you do this, 1.0.x will appear on the “Active Versions” section,
and a new build will be triggered for it.
Note
You can read more about hidden versions in our documentation.
Getting insights from your projects
Once your project is up and running, you will probably want to understand how readers are using your documentation, addressing some common questions like:
what pages are the most visited pages?
what search terms are the most frequently used?
are readers finding what they look for?
Read the Docs offers you some analytics tools to find out the answers.
Browsing traffic analytics
The How to use traffic analytics view shows the top viewed documentation pages of the past 30 days, plus a visualization of the daily views during that period. To generate some artificial views on your newly created project, you can first click around the different pages of your project, which will be accounted immediately for the current day statistics.
To see the Traffic Analytics view, go back the project page again, click on the ⚙ Admin button, and then click on the Traffic Analytics section. You will see the list of pages in descending order of visits, as well as a plot similar to the one below.
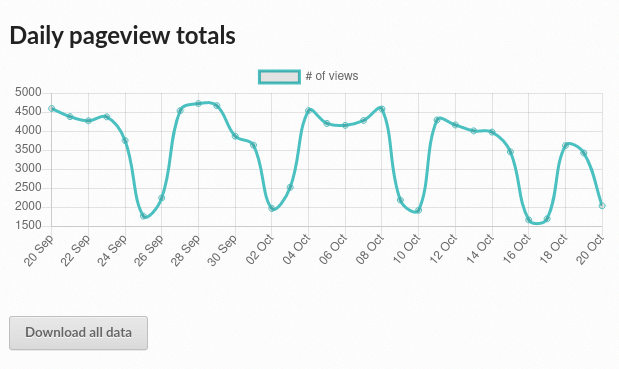
Traffic Analytics plot
Note
The Traffic Analytics view explained above gives you a simple overview of how your readers browse your documentation. It has the advantage that it stores no identifying information about your visitors, and therefore it respects their privacy. However, you might want to get more detailed data by enabling Google Analytics. Notice though that we take some extra measures to respect user privacy when they visit projects that have Google Analytics enabled, and this might reduce the number of visits counted.
Finally, you can also download this data for closer inspection. To do that, scroll to the bottom of the page and click on the Download all data button. That will prompt you to download a CSV file that you can process any way you want.
Browsing search analytics
Apart from traffic analytics, Read the Docs also offers the possibility to inspect what search terms your readers use on your documentation. This can inform decisions on what areas to reinforce, or what parts of your project are less understood or more difficult to find.
To generate some artificial search statistics on the project,
go to the HTML documentation, locate the Sphinx search box on the left,
type ingredients, and press the Enter key.
You will be redirected to the search results page, which will show two entries.
Next, go back to the ⚙ Admin section of your project page,
and then click on the Search Analytics section.
You will see a table with the most searched queries
(including the ingredients one you just typed),
how many results did each query return, and how many times it was searched.
Below the queries table, you will also see a visualization
of the daily number of search queries during the past 30 days.
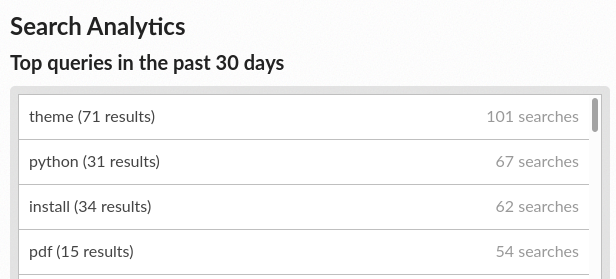
Most searched terms
Like the Traffic Analytics, you can also download the whole dataset in CSV format by clicking on the Download all data button.
Where to go from here
This is the end of the tutorial. You started by forking a GitHub repository and importing it on Read the Docs, building its HTML documentation, and then went through a series of steps to customize the build process, tweak the project configuration, and add new versions.
Here you have some resources to continue learning about documentation and Read the Docs:
You can learn more about the functionality of the platform by going over our features page.
To make the most of the documentation generators that are supported, you can read the Sphinx tutorial or the MkDocs User Guide.
Display example projects and read the source code in Example projects.
Whether you are a documentation author, a project administrator, a developer, or a designer, you can follow our how-to guides that cover specific tasks, available under How-to guides A-Z.
For private project support and other enterprise features, you can use our commercial service (and if in doubt, check out Choosing between our two platforms).
Do you want to join a global community of fellow
documentarians? Check out Write the Docs and its Slack workspace.Do you want to contribute to Read the Docs? We greatly appreciate it! Check out Contributing to Read the Docs.
Happy documenting!